Installing easyconfig Control Panel
This guide explains how to install easyconfig Control Panel on a fresh VPS. It is written for beginners, so even if you are not very experienced with Linux servers, you can follow the steps carefully and complete the installation independently.
Before you begin
You need a fresh VPS or dedicated server with root access. A clean server is recommended because existing web servers, Docker setups, or firewall rules may conflict with the easyconfig installation.
Recommended server requirements
- Ubuntu 22.04, Ubuntu 24.04, Debian 12, AlmaLinux, or a similar modern Linux distribution.
- At least 2 GB RAM for basic usage.
- At least 2 CPU cores for smoother performance.
- At least 20 GB disk space.
- Root or sudo access.
- A public IPv4 address.
Step 1: Connect to your server using SSH
Open Terminal, Command Prompt, PowerShell, or any SSH client and connect to your server:
ssh root@YOUR_SERVER_IPReplace YOUR_SERVER_IP with the real IP address of your VPS.
Step 2: Update your server packages
Before installing any control panel, update your server package index and installed packages.
For Ubuntu or Debian:
apt update && apt upgrade -yFor AlmaLinux or another RHEL-based system:
dnf update -yStep 3: Run the easyconfig installer
Use the official installer script from get.dockercp.com:
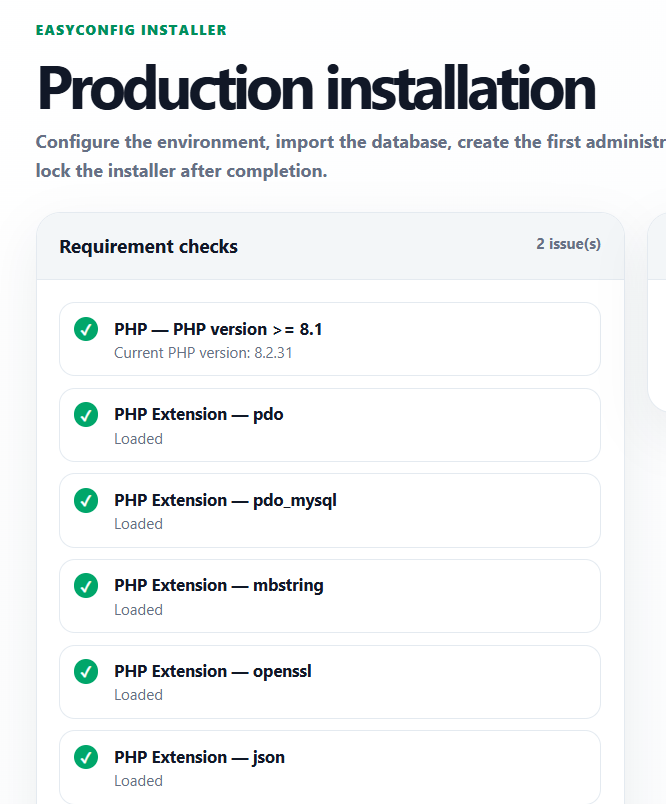
curl -sSL https://get.dockercp.com/install.sh | shThe installer is responsible for preparing the required directories, checking Docker availability, preparing the panel environment, and starting the easyconfig stack.
Step 4: Wait for the installation to complete
The installation may take a few minutes depending on your server speed and network connection. Do not close the terminal while the installer is running.
Step 5: Open easyconfig in your browser
After installation, the installer should show the panel URL or IP-based access URL. Open it in your browser. If you installed on a fresh server, the first access may be available through your server IP before you connect a custom domain.
Step 6: Complete the first login
Use the admin credentials shown during installation, or create the first admin user if the installer opens the setup screen. After login, immediately change the default password from the settings area.
Step 7: Secure your panel
- Change the default admin password.
- Connect a custom panel domain if available.
- Enable SSL for the panel domain when the option is available.
- Keep your server packages updated.
- Restrict SSH access if you understand firewall rules.
Avoid common mistakes
- Installing on a server that already has conflicting web server rules.
- Using a server without enough RAM.
- Closing SSH before the installer finishes.
- Running the installer as a non-root user without sudo permissions.
- Pointing a domain before DNS propagation is complete.
Commands
The panel handles most actions visually, but these commands help beginners understand what a server operator usually checks while working with Docker-based deployments.
docker --version
docker compose version
docker ps
docker logs --tail=100 container_name
df -h
free -m
Summary
| Area | What to check | Expected result |
|---|---|---|
| Server | CPU, RAM, disk, firewall, Docker | The server has enough resources and Docker is available. |
| Application | Image, tag, port, variables, storage | The service can start and keep data after restart. |
| Network | DNS, proxy route, SSL, browser response | The app is reachable from the correct domain. |
| Security | Roles, secrets, audit logs, backups | The setup is safe enough for continued operation. |
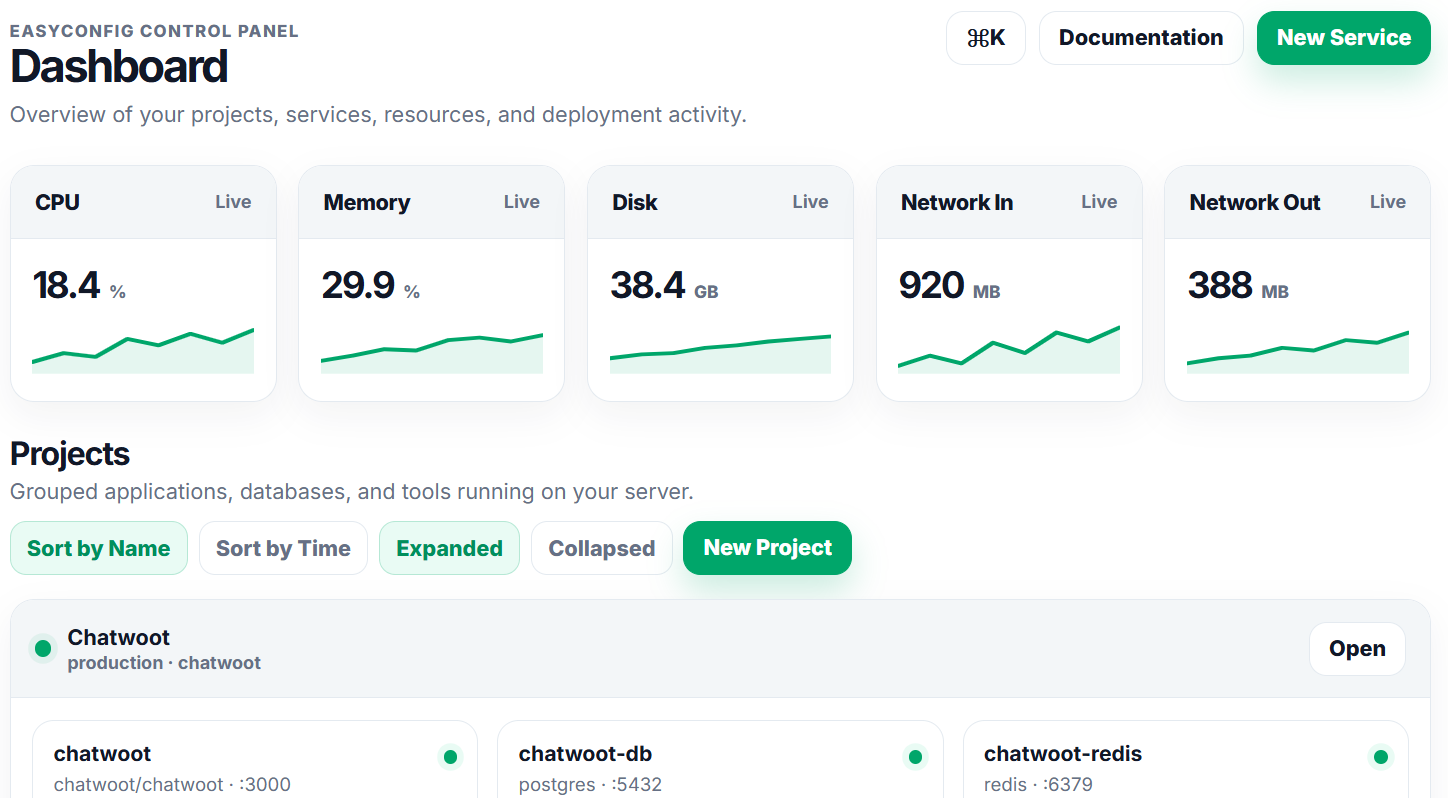
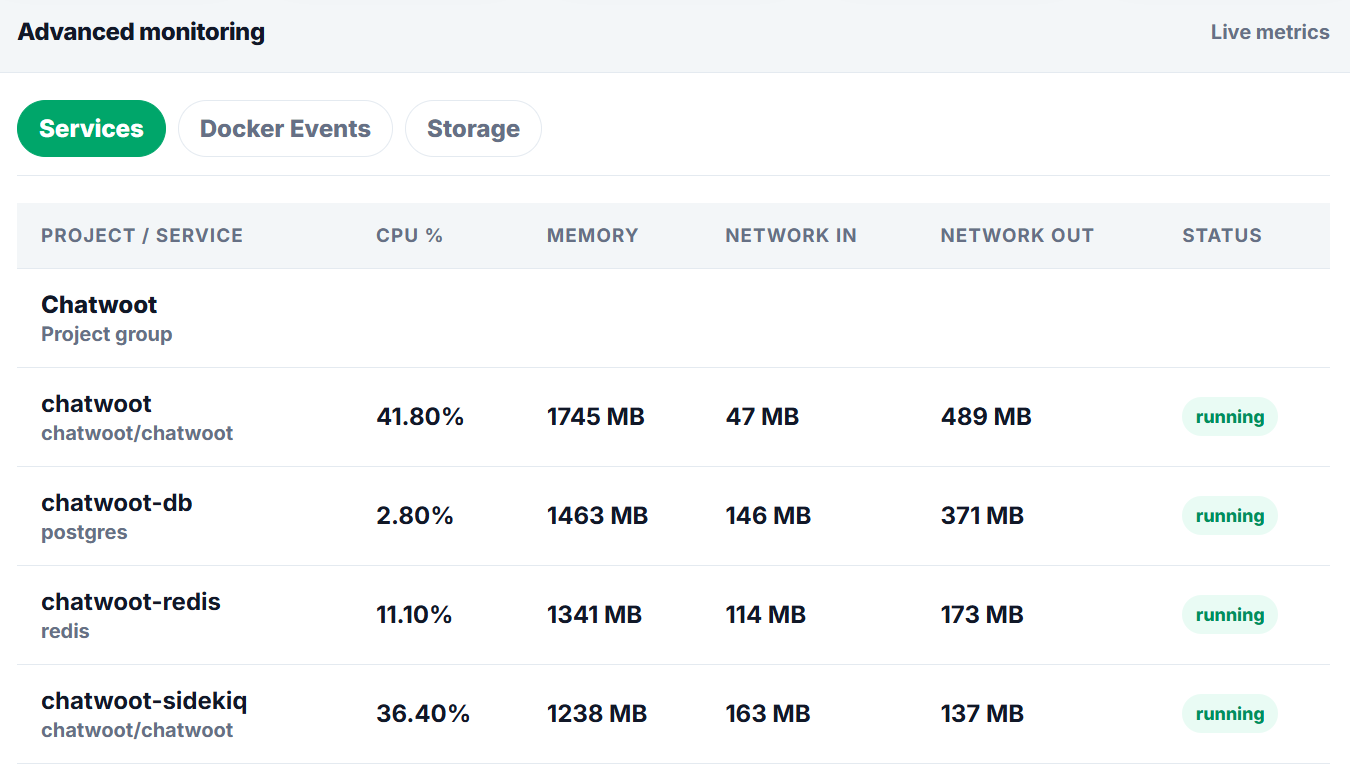
Screenshots
Upload screenshots to the paths below when you want the documentation to show real easyconfig interface examples.
Next
- Apply the guide in a test project first.
- Check logs after every deployment or configuration change.
- Document custom values for future handoff.
- Review related documentation when domains, SSL, databases, or billing are involved.